Monday, June 8, 2015

Final Fabrication

3d printing is an amazing tool that modern day designers use to print objects that actually take the form of the 2d picture that is initially used.

I had originally envisioned the design to come out like a ring with an engraved lightning bolt.  This is an example of the ring my partner created.  The difference between a machine and human making a design is that a machine creates the design flawlessly while a human design is prone to many mistakes.  Drawings are always necessary otherwise, the person making the design would have to make the design using their imagination which would not be exactly as the person might have wanted.  3d animated designs can help create the blueprints for what you want to design and can also be a template to even create the design thanks to 3d printing beyond just the design process.

In the Intro-to-Deign class, I became a better designer.  I have been working towards my class goals by following the design process and creating different designs.  I learned how to CAD my models which I had never knew how to do before.  In the Principles to Design class, I hope to further my skills as a designer and create more complicated designs.  

Wednesday, May 20, 2015

Maker Faire Reflection

MAKER FAIRE WAS A SUCCESS!!!!!

Our beta tested game attracted a lot of attention throughout all three days of Maker Faire.  The feedback we received will hep us edit the game so it might actually be a success.  However, for a beta-test of the game, I say that that the game was a success because of the fact that we were able to create a prototype of the game within a two month time limit and met all of my expectations for the test.  The survey we gave out showed us that people would like our main character to have more functions and that is exactly what we plan on doing next time, specifically making weapons for the character.
The 3-D printing at Maker Faire really influenced me because it gives me proof that a world of unlimited possibilities exists and I can be involved in that world.  I loved Maker Faire and i would love to go there again.

Wednesday, May 13, 2015

Maker Faire Showcase

For our showcase of our game at Maker Faire, I wanted to present our game in a similar fashion of exhibits in the Tech Museum in San Jose.  I wanted a table with posters about the game and creators with a laptop and the game in the center..  Something like the picture below
I intended our design to have a shape  of a dome because our main part of our game involves a Colosseum.  My role in this game design team was to research material for any requirement necessary for my teammates and also help them succeed in their tasks.  My role changed for just working on Unity to helping design the main character, improving the story line, making the game functional, and finding out how to deal with problems in coding such as programming the AI's. I feel that we reached a little short of our goal because the game has no been perfected.  I wish we had more time to make our game because we had limited time to make it.  My greatest achievement in the game was programming the AI's to follow the main character and creating the enemies in our game.

Sunday, April 26, 2015

Reverse Engineering


Today, we tried to see how reverse engineers do their work.  We got an Automoblox Car toy and took it apart to see how it functioned and how it was made.
We found that the car had:
4 wheels
1 4-seat base
4 seats
Back Base
Front Body
Wind ahield
4 Axles
Reverse Engineers use the information they gain by studying the parts of the item they dismantle to fix it or rebuild copies of it.
The car is made child friendly and is appealing to consumers because of it sturdy and realistic look.

Functionally, the Automoblox car's function is to roll and act like a car so children can dismantle it and rebuild it.  Thus, gives education to children about building and allowing them to play with toy cars.

The car is structurally designed to withstand all the damage a kid could do to it and is designed to look like a car.  The axles, wheels, and main body make the car have a realistuic sructure resembling actual cars.

If I could change the Automoblox design I would make the entire car smaller so that it is less heavy and not a threat to children. I would still keep the parts at a decent size because the parts are removable and children swallow the small removable parts.

Friday, April 24, 2015

Things on UnityCont.

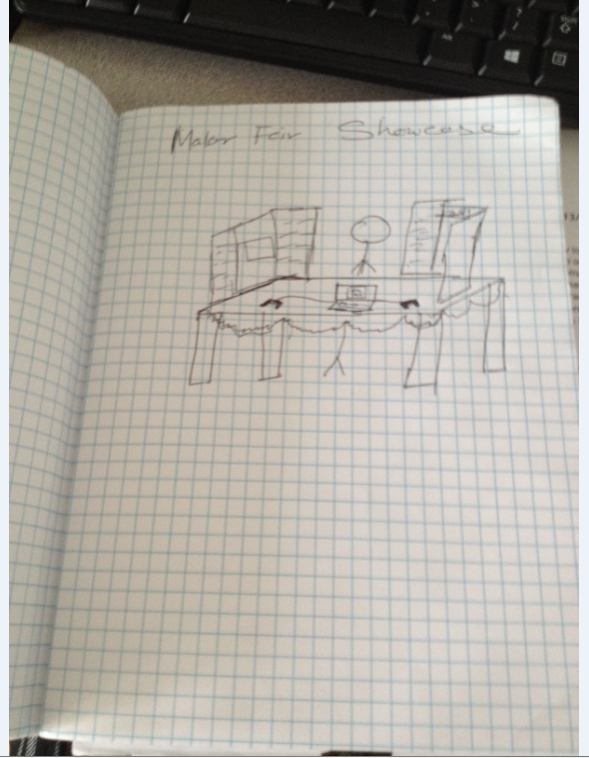
  This week I was trying to find out if I could help with animations research to incorporate text and animations for our main character into our game.

These are some of the things I discovered the following:

Character animations:

and how to import the animations:

Animation from External Sources

Overview of Imported Animation

Animation from external sources is imported into Unity in the same way as regular 3D files. These files, whether they’re generic FBX files or native formats from 3D software such as Maya, Cinema 4D, 3D Studio Max, can contain animation data in the form of a linear recording of the movements of objects within the file.
In some situations the object to be animated (eg, a character) and the animations to go with it can be present in the same file. In other cases, the animations may exist in a separate file to the model to be animated.
It may be that animations are specific to a particular model, and cannot be re-used on other models. For example, a giant octopus end-boss in your game might have a unique arrangement of limbs and bones, and its own set of animations.
In other situations, it may be that you have a library of animations which are to be used on various different models in your scene. For example, a number of different humanoid characters might all use the same walk and run animations. In these situations, it’s common to have a simple placeholder model in your animation files for the purposes of previewing them. Alternatively, it is possible to use animation files even if they have no geometry at all, just the animation data.
When importing multiple animations, the animations can each exist as separate files within your project folder, or you can exctract multiple animation clips from a single file. You might want to do this if your file contains multiple separate animations arranged on a single timeline. For example, a long motion captured timeline might contain the animation for a few different jump motions, and you may want to cut out certain sections of this to use as individual clips and discard the rest. Unity provides animation cutting tools to achieve this.

Importing Animation Files

Before any animation can be used in Unity, it must first be imported into your project. Unity can import native Maya (.mb or .ma), 3D Studio Max (.max) and Cinema 4D (.c4d) files, and also generic FBX files which can be exported from most animation packages (see this page for further details on exporting). To import an animation, simply drag the file to the Assets folder of your project. When you select the file in the Project View you can edit the Import Settings in the inspector:
The Import Settings Dialog for a mesh

Friday, April 17, 2015

Things on Unity


This week, my team was looking up the features of Unity and to see how to implement them into our game.  The above picture shows some of the features Unity already has and things that we would have to make.  With knowledge of these features, we will be able to make our game faster. 

Tuesday, March 24, 2015

Game Design Team and Game wishes

Structure, Mainframe, Coding are the key things and engineer has to do.  I believe I have the skills needed to be an Engineer in developing our game.  I know I can collaborate with others and make this idea work.
i-have-no-words-i-must-design.png (1280×800)

gamedesigner.jpg (400×250)

I want our game to be similar to the Legend of Zelda because I feel that it is a very influential game which incorporates action, adventure and puzzle. Zelda was created by Shigeru Miyamoto and Takashi Tezuka because they wanted to create a fantasy world game filled with action, adventure, and puzzle. It was developed by Nintendo and had a team of designers working on each of the game for more than one year per game making the entire virtual world of the game.
the-legend-of-zelda-wallpaper.png (1024×576)

Friday, March 20, 2015

Dimensioning Standards


All these parts were made using different skills in inventor.  The third part was the only difficult process because it used techniques we had never even believed were possible,
Size and location dimensions are different in that one must be set and changed, also size dimensions)just occur when clicked upon.
Chain dimensioning helps present constraints while Datum dimensioning is easier to use when modifying .

A written description of an item gives a lot of information about the item that need to be processed in a person's  mind. A dimensional drawing is a drawing or representation of the object with its dimensions.

Thursday, February 19, 2015

CAD model

In this design we are trying to build a car.  We started of with the base and this is how far we got.
Creating the shapes was an easy part of the design process. What was difficult was finding out how to align the shapes in place.  The thing I am still wondering is how to build a star.

Wednesday, February 18, 2015

Geometric Constraints

We had a build the framework form the most durable shelter.  We decided to make our shelter have 45, 90, 60, and 180 degree angles because those are some of strongest angles formed by squares and triangles. Squares and triangles are used because the angles they form are often stable because of an even distribution of the interior angles since a 60-60-60 triangle is very stable as well as a 90-90-90-90 square. We picked these shape because they have the most mass and stability.  Thee 60 degree angle gives the most stability because they form an equilateral triangle which has the most equal measure of angles(60,60,60).  The exterior surface is mostly triangles and squares.  Our total surface area was 128 inches squared and we tested the durability of the shelter by placing different weights on the shelter.  This design follow's form follow's function because it looks like a house which serves its true purpose.

The function of a house is to have a strong foundation to endure the hardships of nature and provide living beings a place to live.  Our model serves it's purpose it is very stable and is a miniature model of a real shelter which can house people.  The angles we used gave the model great stability.

Wednesday, February 11, 2015

Problems with Inventor

My quetion was how do you to build a sphere in inventor. As we continue in our designing process, a crucial part is to know how to build a sphere.  Nowadays, we use spheres in everyday life so it is important to know how to implement them in designs. I wanted to know how to build a sphere on Inventor so I found a good video that explains the process. Below is a link that explicitly explains how a sphere on Autodesk Inventor

www.youtube.com/watch?v=psbjvl6kaH4

Here is a finished look of the sphere.


After understanding how to solve my problem. I moved on to my friends problem on how to center objects
 that are not on the origin.  He showed me that after you make one object. Inventor gives dotted lines in the 
center of the object you are trying to make and when all the dimensions are equal, you have centered your 
new figure.

Sunday, February 8, 2015

Form Follows Function Reflection

Form Follows Function is the principle that the shape of a building or object should be primarily based upon its intended function or purpose.

The design I believed that I could improve hat follows form follows function was the spatula. I have seen how the spatula's main purpose is built in the shape that it can scoop up something small.  However, it is hard for those spatulas to slide under materials that are thick level and sticky.  According to Silicone Spatula Review, problems with spatula's today is that some are too flexible while other designs are too hard meaning that only one spatula was good form its own individual function.My design is a spatula that has a thickness of 0,001 cm, well oiled, has an average flexibility and lower than the handle so it would be easier to pick up the harder materials you would want to pick up which can .  This design goes with form follows function because it follows it function to lift objects but it does it's job better than a normal spatula because it can slide under sticky objects without getting stuck and it accomplishes to functions at once..

Monday, February 2, 2015

Puzzle Reflection

                                                                  Final Puzzle Design
The Final project consisted of 5 pieces that interlocked.  It is important to model an idea before creating a final prototype so you get a chance to test out which model works.   The thing I liked about my puzzle is that it is simplistic but confusing because it looks very easy but can be confusing.  The one thing I would like to change is the complexity of the puzzle because some people solved it very easily.
Afterwords we had to build a cover for the finished prototype
This puzzle met all of my expectations because it was complex even though it looked simplistic.  It took an average person about 10 minutes to solve this puzzle.  It met all the standards I had set out on the previous post.
These are some brainstorming and designs I built for the puzzle.
At the end I did my friends puzzle and it took me 10 minutes to solve it


Thursday, January 22, 2015

Measurements of 27 Mini Cubes for an Interlocking Cube Puzzle

Cube 1:   0.7251
Cube 2:   0.7241
Cube 3:   0.7255
Cube 4:   0.7255
Cube 5:   0.7251
Cube 6:   0.7249
Cube 7:   0.7249
Cube 8:   0.7258
Cube 9:   0.7250
Cube 10: 0.7251
Cube 11: 0.7251
Cube 12: 0.7273
Cube 13: 0.7269
Cube 14: 0.7243
Cube 15: 0.7295
Cube 16: 0.7254
Cube 17: 0.7251
Cube 18: 0.7251
Cube 19: 0.7250
Cube 20: 0.7241
Cube 21: 0.7247
Cube 22: 0.7254
Cube 23: 0.7253
Cube 24: 0.7253
Cube 25: 0.7246
Cube 26: 0.7251
Cube 27: 0.7287

Now we get these cubes, and organize them into different patterns consisting of no more than 6 cubes that are joined together. We have to make 5 pieces using those cubes and find a way to interlock those pieces and form a perfect 3x3x3  cube.


Thursday, January 8, 2015

Unit Conversion

Juan, Catherine, Ashab, and I made a power-point to explain unit conversion.  This was an attempt to make learning unit conversions fun.  We had a great time making this power-point and it made us improve our teamwork and presentation skills. Unit Conversion Presentation. This is a link to our presentation and we succeed in this with a mixture or information and fun jokes and rewards.